.NET on AWS Blog
Deploy to Elastic Beanstalk with GitHub Actions
AWS Elastic Beanstalk makes deploying, managing, and scaling .NET web applications on Amazon Web Services easy. This powerful service is available to anyone developing or hosting .NET apps on IIS.
In this post, I’ll demonstrate how to set up a continuous deployment pipeline to Elastic Beanstalk directly from GitHub using GitHub Actions. With just a few configuration steps, you can automatically build, test, and deploy your .NET code to Elastic Beanstalk environments whenever you push changes to your repository.
Overview of solution
For this demonstration, we will use the ASP.NET Core MVC Web Application template in Visual Studio to create a sample application. The source code will be hosted in a GitHub repository, which will trigger GitHub Actions to handle the continuous integration and delivery (CI/CD) pipeline.
GitHub Actions will build, and package the .NET application on every push to the repo. The artifacts will be staged in an Amazon Simple Storage Service (Amazon S3) bucket to deploy to Elastic Beanstalk. Using Elastic Beanstalk will provide a managed environment to run the ASP.NET application and auto-scale based on demand.
This end-to-end solution utilizes Amazon S3 and Elastic Beanstalk, that integrate nicely with GitHub for source control and Actions for CI/CD. The default MVC application gives us the necessary code to showcase setting up the pipeline stages. We will configure the GitHub workflows, AWS access, and Elastic Beanstalk settings to enable automatic deployments on each code change.
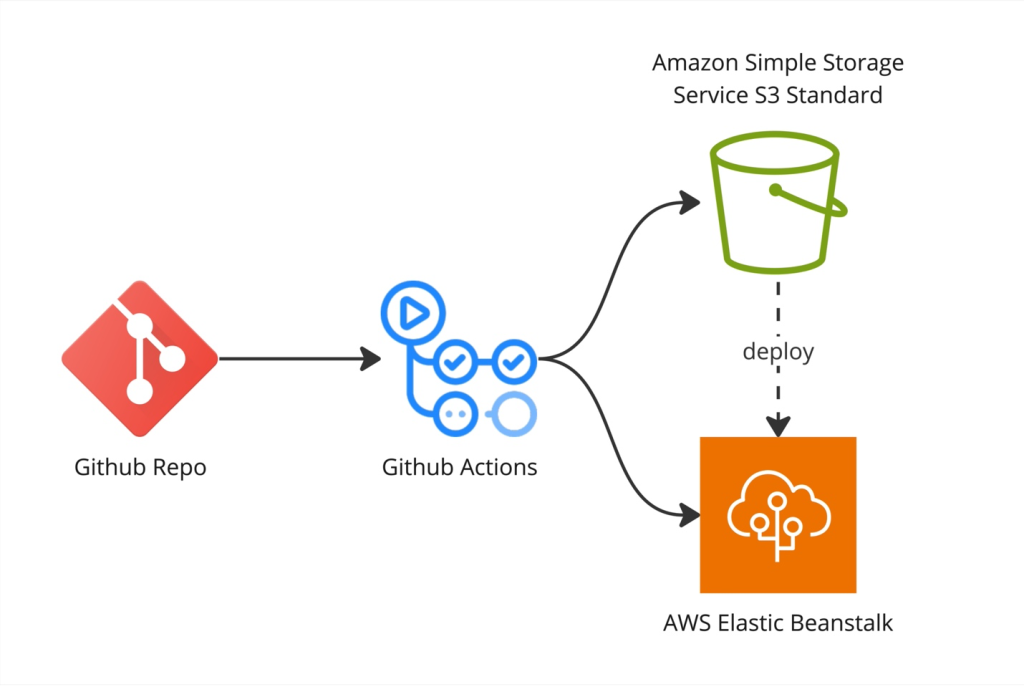
Figure 1: Solution overview
Walkthrough
To perform this walkthrough, you’ll need the following:
- An AWS account.
- A GitHub account.
- Git installed on your development machine.
- Visual Studio installed on your development machine.
- General familiarity with GitHub.
- General familiarity with AWS and the IAM service.
Walkthrough steps:
- Create a new GitHub repository to store the code
- Create an Elastic Beanstalk Application & Environment for deploying .NET Code
- Publish and push the ASP.NET MVC application code to the GitHub repository
- Configure a GitHub workflow that defines the CI/CD pipeline stages
- Continuous Deployment to Elastic Beanstalk Environment
Prerequisites
For this walkthrough, you should have the following prerequisites:
- An AWS account – with access to create IAM User
- Visual Studio 2022
- GitHub Account
Step 1: Create a new GitHub repository to store the code
To get started, we need to create a new GitHub repository that will host our .NET code. This will be the central source control repository that triggers our CI/CD pipeline.
Log into your GitHub account and click the “+” icon in the top right and select “New repository”. Give the repository a name like “dotnet-mvc-app”. You can initialize it with a README file and gitignore for Visual Studio.
Make sure to create the repo in your personal account or an organization you have access to. We’ll need to connect GitHub Actions workflows and deploy keys later which require admin permissions.
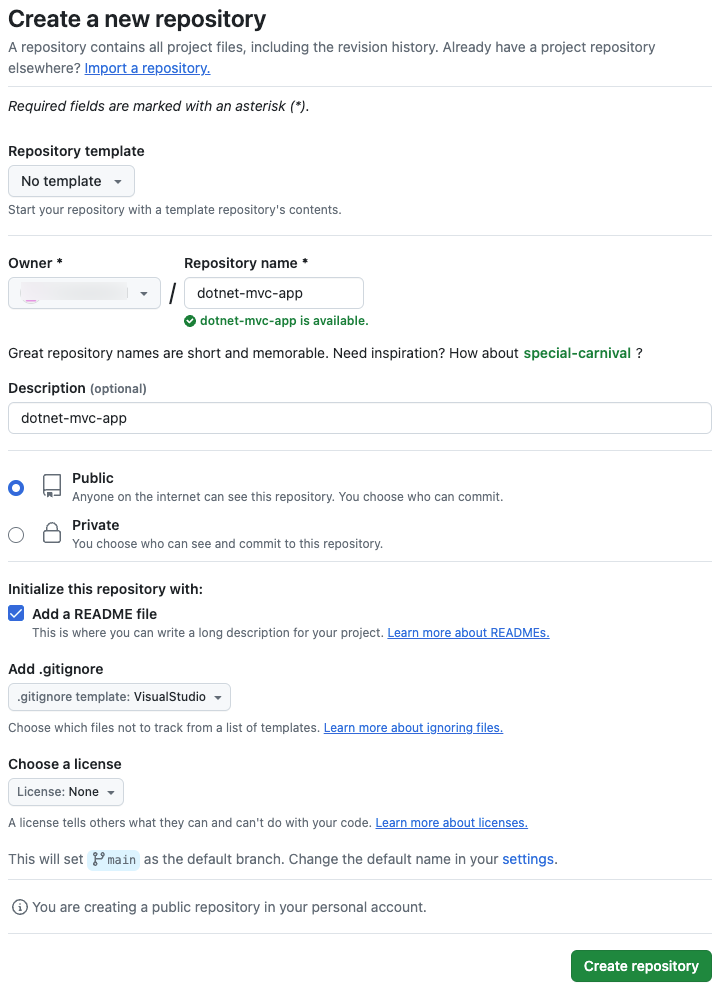
Figure 2: Create repository
Step 2: Create an Elastic Beanstalk Application & Environment
In the Elastic Beanstalk console, choose Create New Environment to set up an environment for deploying our .NET code.
Under Environment Tier, select Web server environment to host a web application.
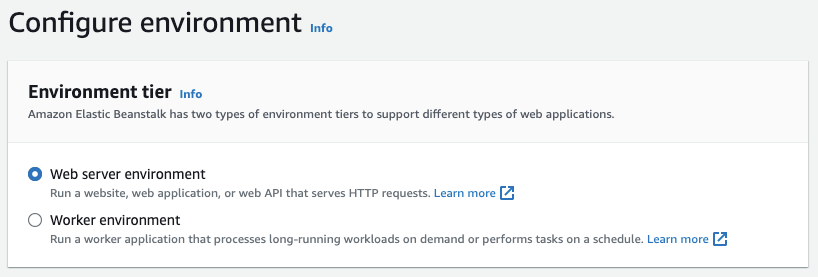
Figure 3: Configure environment
Name the Application something like “dotnet-mvc-app-host” and tag the app as dotnet-mvc.
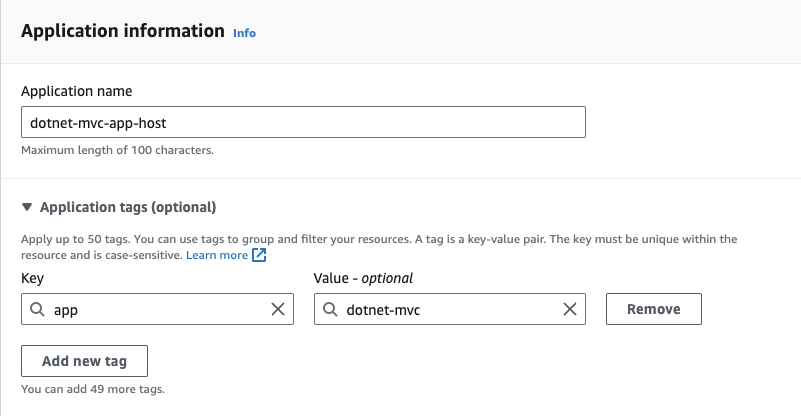
Figure 4: Application configuration
Optional, if needed, provide the Environment name and Domain. I choose to go with the default.
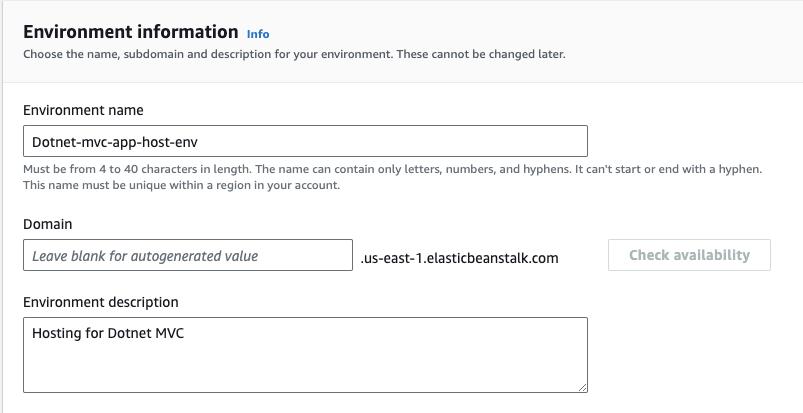
Figure-5: Environment configuration
For Platform, select .NET Core on Linux. The AWS Elastic Beanstalk .NET Core on Linux platform is a set of platform versions for .NET Core applications that run on the Linux operating system. Under Application Code, select Sample application to start with a basic default app. We’ll deploy our own code later.
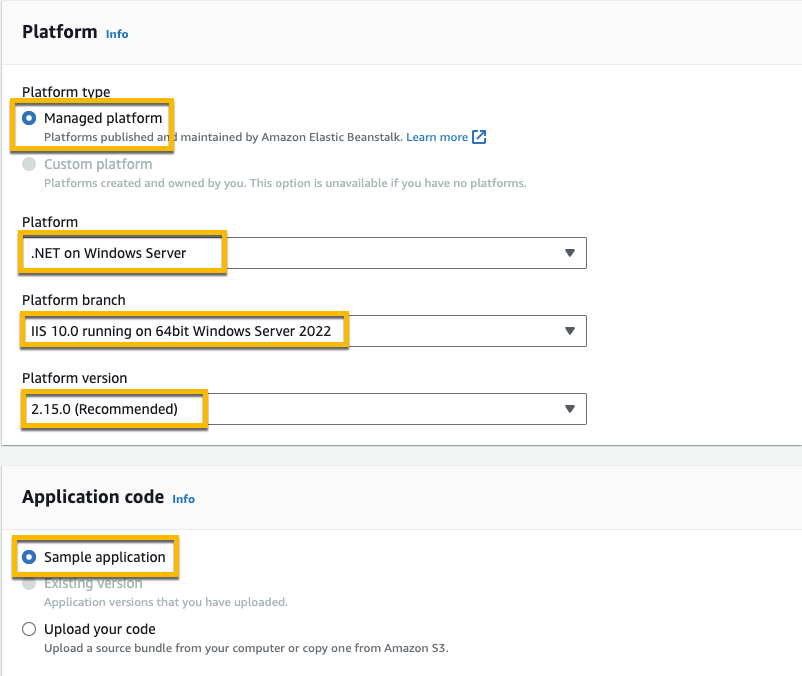
Figure 6: Platform configuration
Select Single Instance configuration for the demo. Then choose Next.
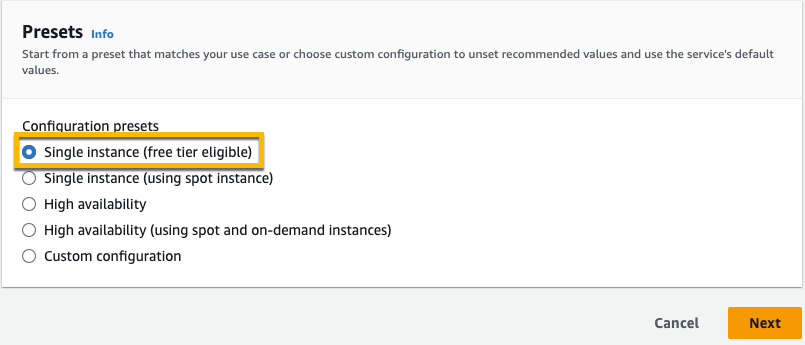
Figure 7: Preset configuration
Moving on to Configuring Service Access,
- Service role name – Enter the name for an IAM role that Elastic Beanstalk will create to assume as a service role. Beanstalk will attach the required managed policies to it. For more details, follow Elastic Beanstalk service role
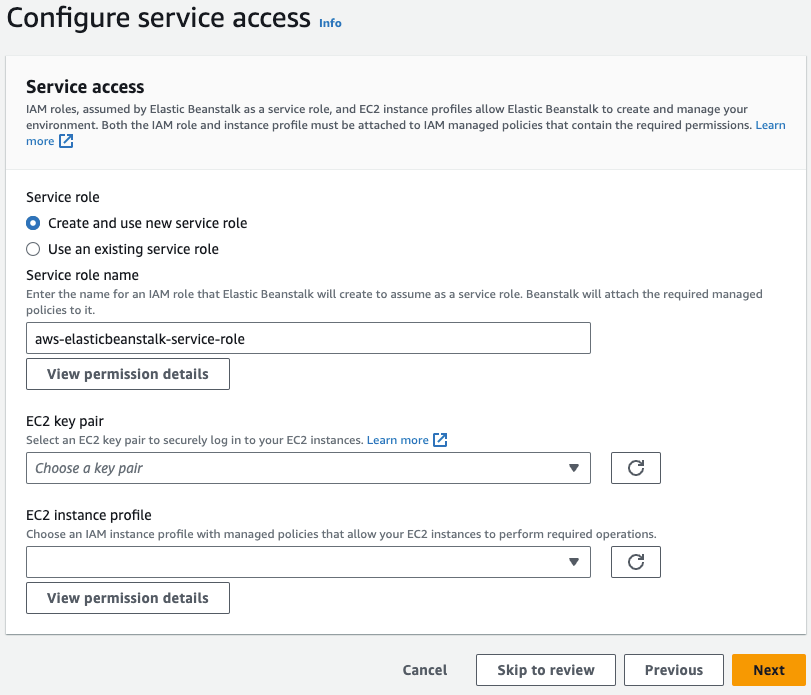
Figure 8: Configure Service Access
You can choose to create the role by yourself and choose Use an existing service role. Here are the details to create the role:
- EC2 key pair – Select an EC2 key pair to securely log in to your EC2 instances. Optional, if you want to login to the EC2.
- EC2 instance profile – Choose an IAM instance profile with managed policies that allow your EC2 instances to perform required operations. For more details, follow Elastic Beanstalk instance profile
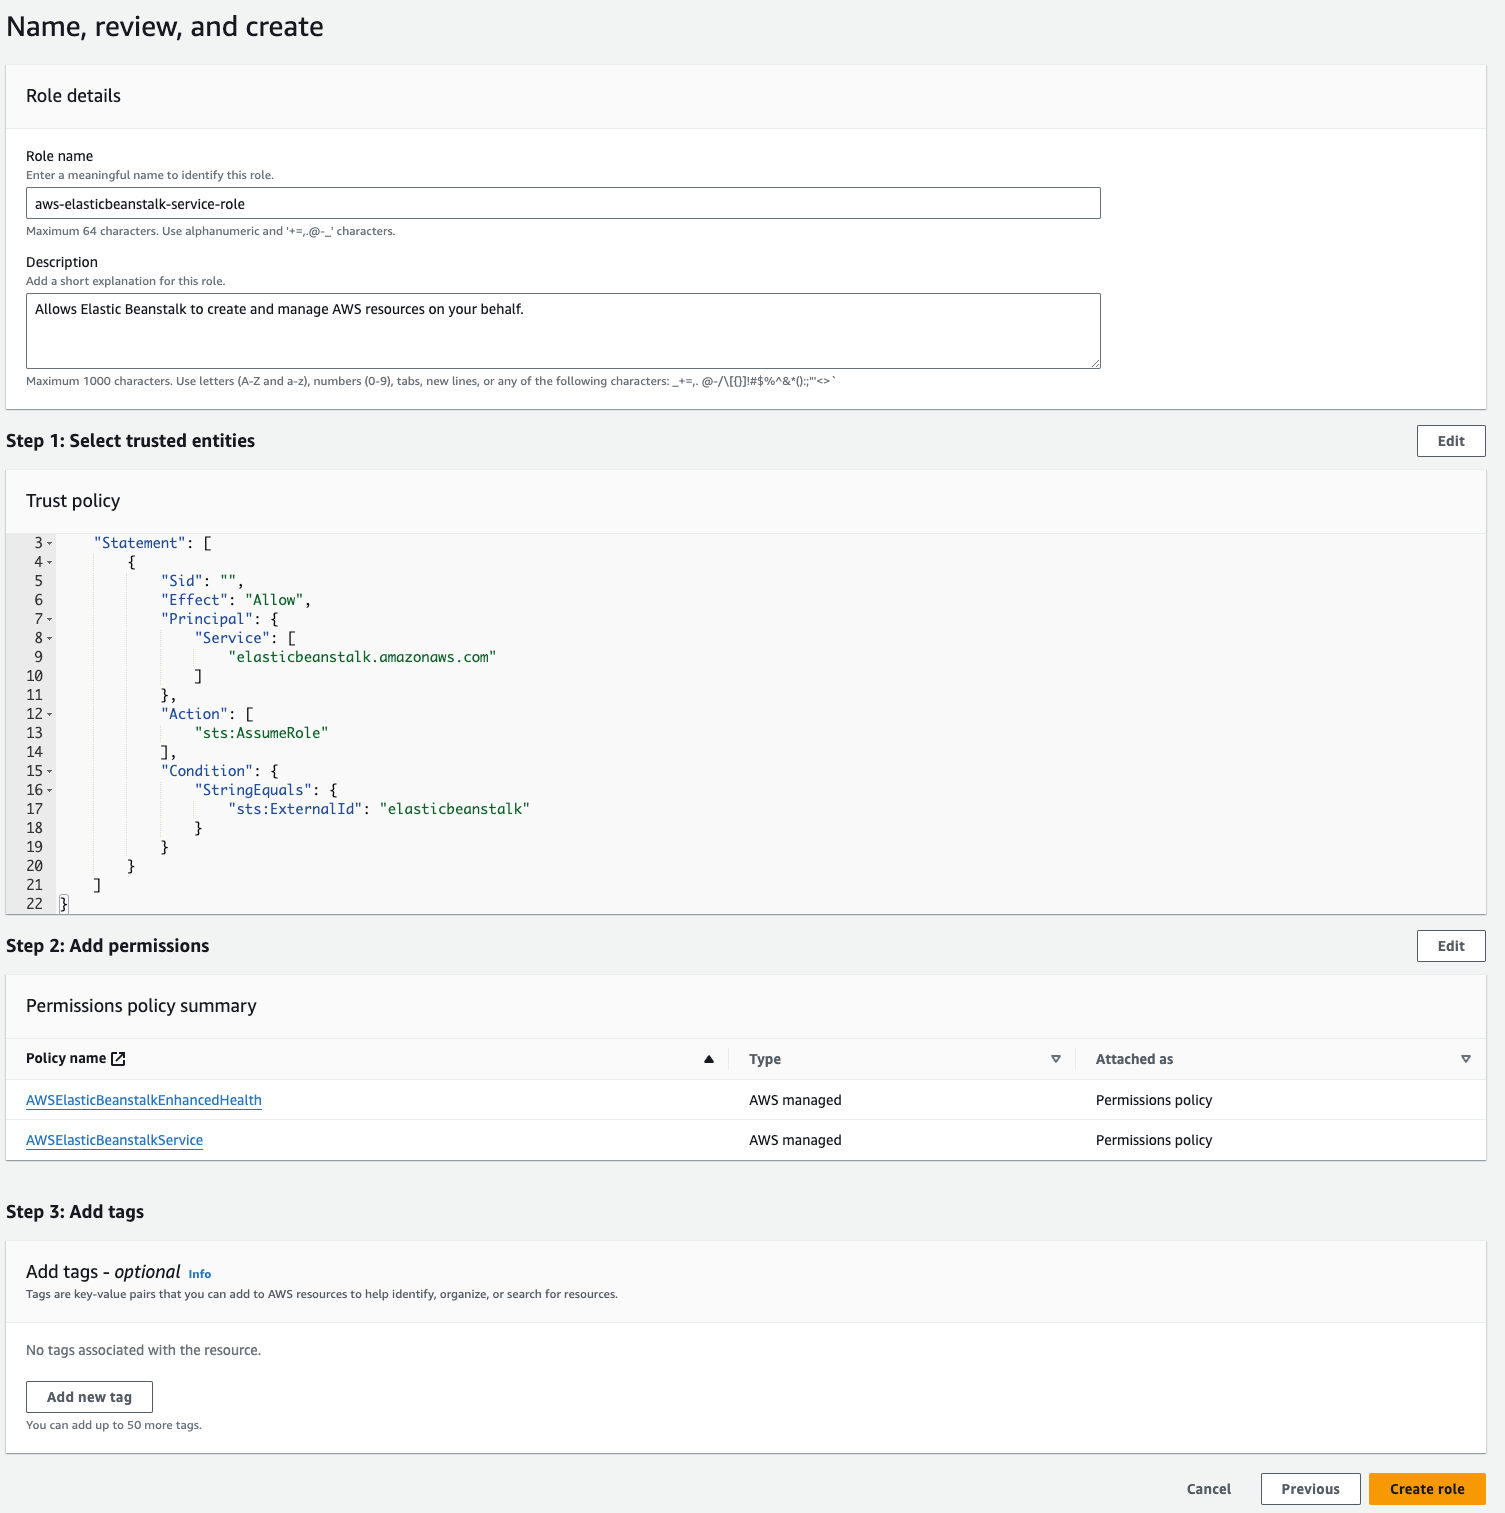
Figure 9: Access review
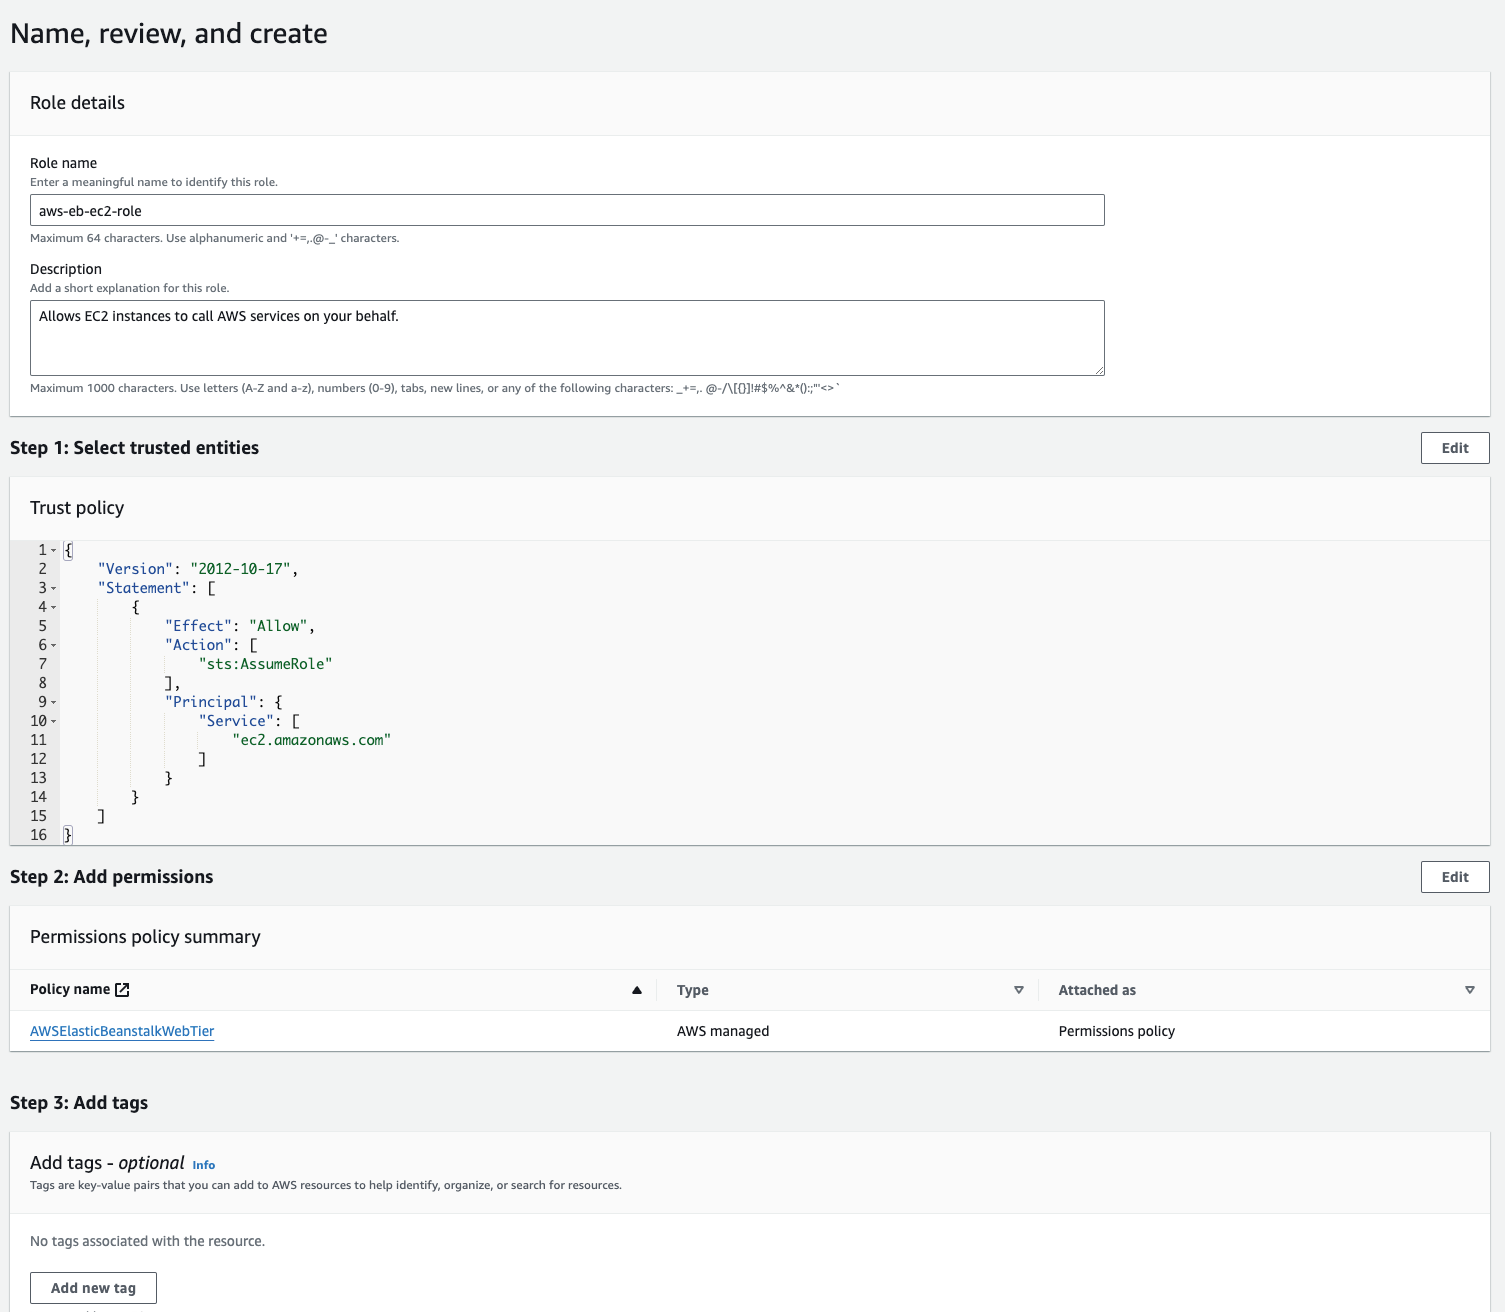
Figure 10: Access review
With all required configuration filled and the rest of the information left as defaults, choose Skip to review.
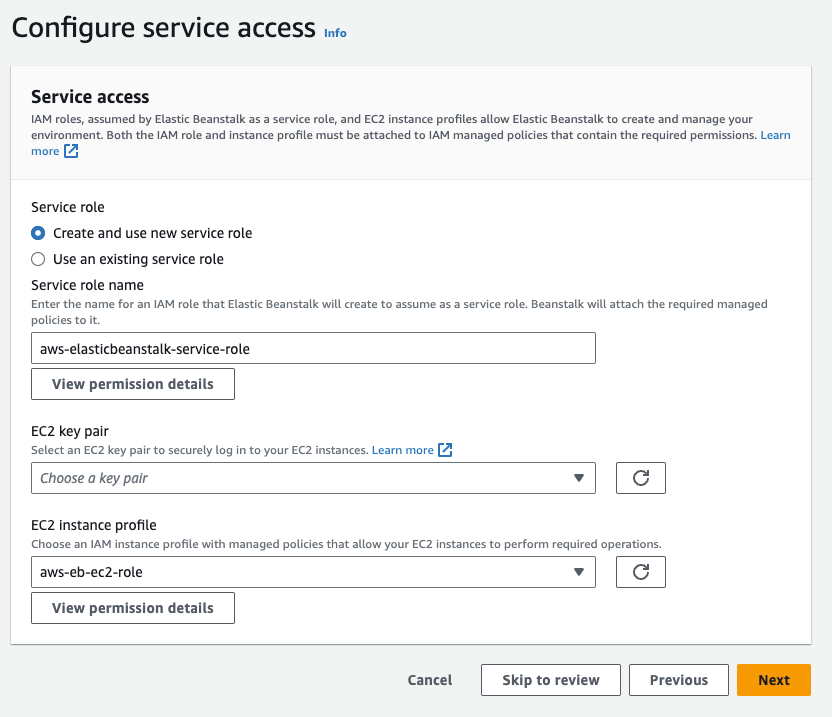
Figure 11: Configure service access
Finally, review all the settings and launch the environment.
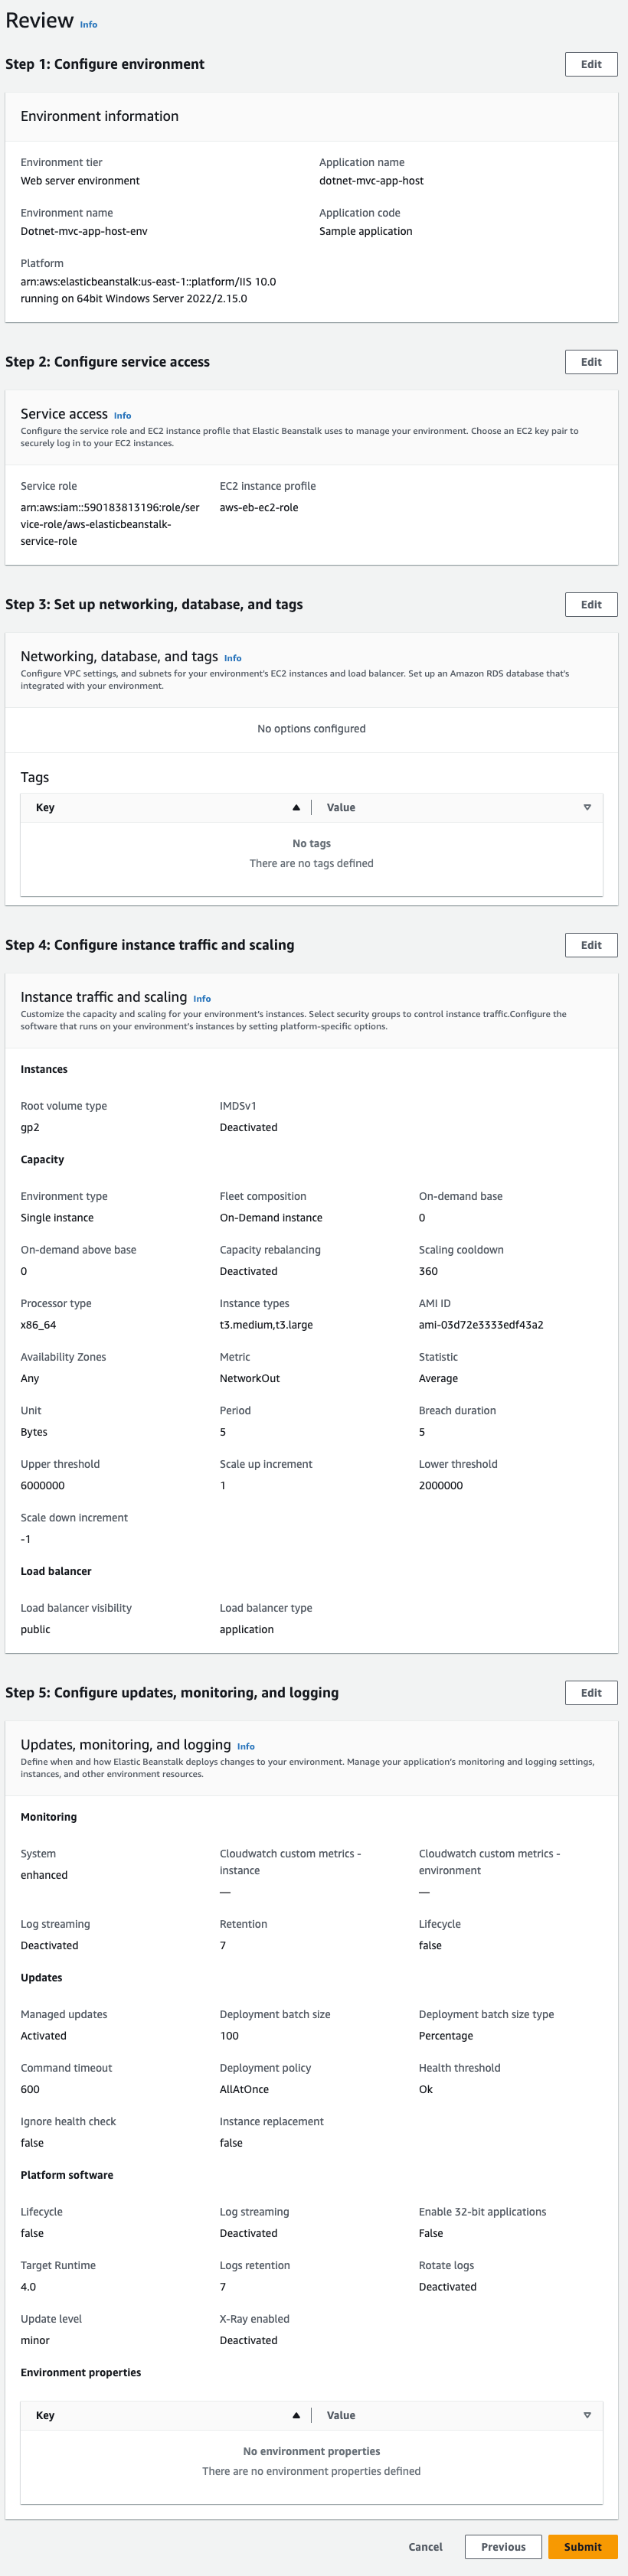
Figure 12: Review Elastic Beanstalk configuration
Once the environment changes to “Healthy”, you can access the sample application using the environment URL (under Domain). We’re now ready to deploy our own .NET code using GitHub Actions.
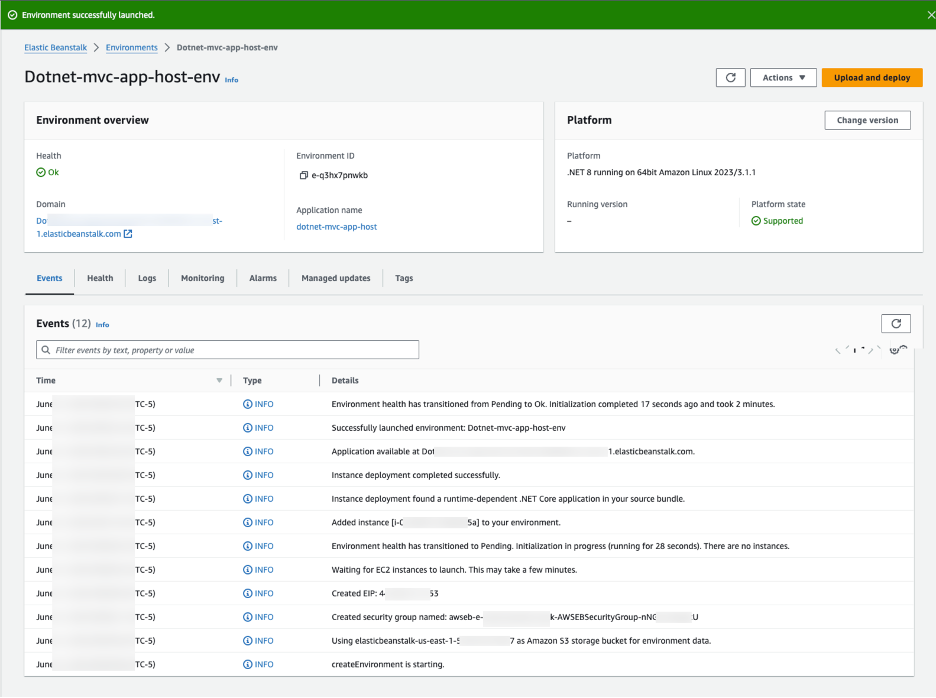
Figure 13: Elastic Beanstalk environment

Figure 14: Sample application
Step 3: Publish and push the ASP.NET MVC application code to the GitHub repository
First, clone the empty GitHub repository we created earlier to your local machine:

Figure 15: Git clone
Next, open Visual Studio and create a new ASP.NET Core Web Application. For Location choose the path where we cloned the repo and check “Place Solution and Project in the same directory”. Select the Model-View-Controller template and target .NET 8.0 which is the current LTS release.
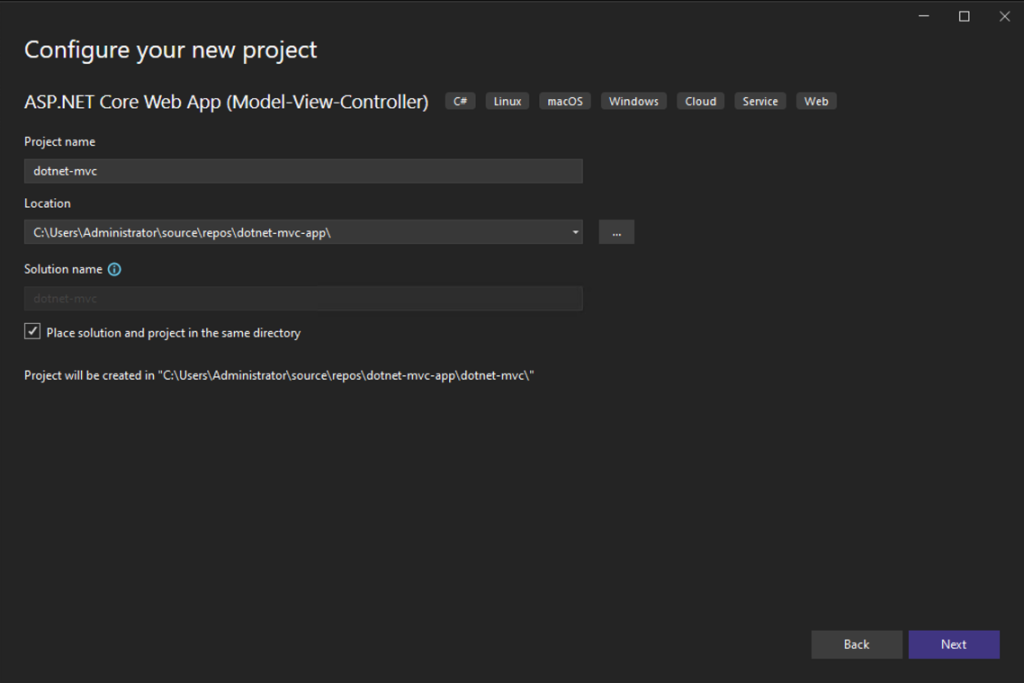
Figure 16: Configure New Project
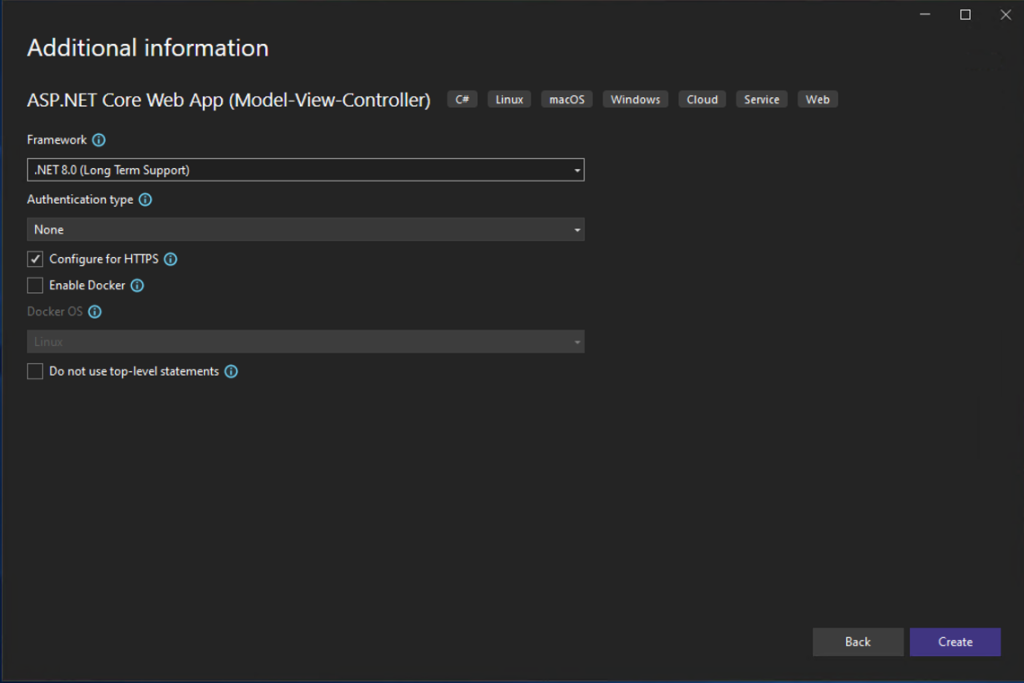
Figure 17: Additional information
Build and run the application locally to verify it works.
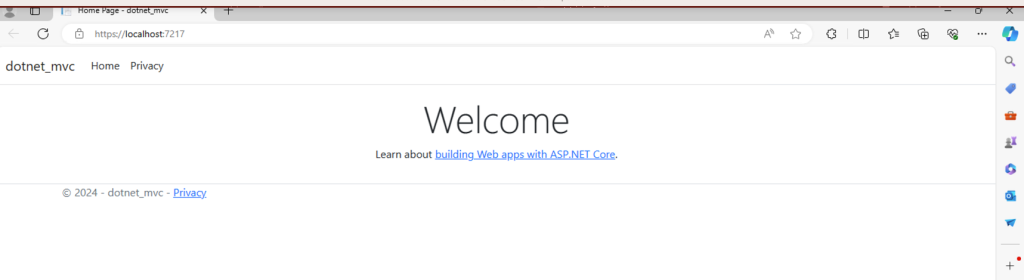
Figure 18: Application running in local environment
As we created the project in the cloned folder, simply commit and push the code from Visual Studio.
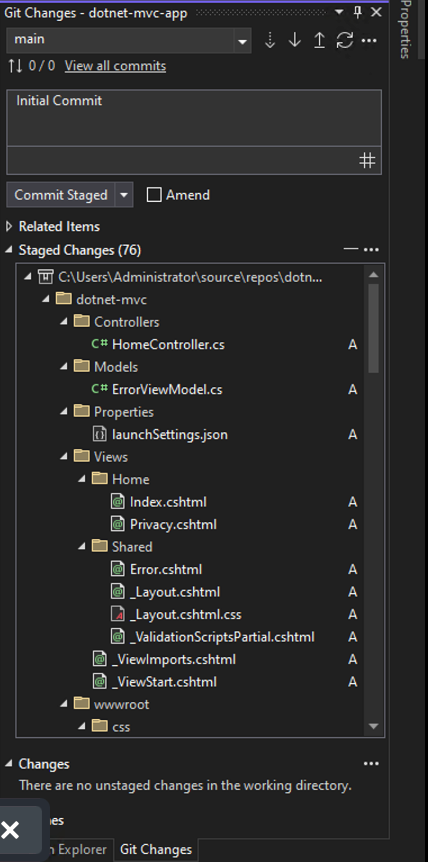
Figure 19: Git commit in Visual Studio
Step 4: Configure a GitHub workflow that defines the CI/CD pipeline stages
To set up continuous integration and delivery, we need to create a GitHub workflow configuration file. This will define the pipeline stages that run on code changes. Create a new YAML file such as .github/workflows/dotnet.yml with the following code:
name: .NET

on:
  push:
    branches: [ "main" ]
  pull_request:
    branches: [ "main" ]

env:
  PROJECT_LOCATION: dotnet-mvc/dotnet-mvc.csproj
  ELASTIC_BEANSTALK_NAME: dotnet-linux
  ELASTIC_BEANSTALK_ENV_NAME: Dotnet-linux-env

jobs:
  build:

    runs-on: ubuntu-latest

    steps:
    - uses: actions/checkout@v4
    - name: Setup .NET
      uses: actions/setup-dotnet@v4
      with:
        dotnet-version: 8.0.x
    - name: Restore dependencies
      run: dotnet restore $PROJECT_LOCATION
    - name: Build
      run: dotnet build --no-restore $PROJECT_LOCATION
    - name: Pack
      run: |
        dotnet publish $PROJECT_LOCATION -c Release --output "${{ github.workspace }}/${{github.run_id}}"
        cd ${{github.run_id}}
        zip -r ../${{github.run_id}}.zip .
    - name: Upload Artifacts
      uses: actions/upload-artifact@v4.3.3
      with:
        name: deploy-files
        path: ${{github.run_id}}.zip
  deploy:

    runs-on: ubuntu-latest
    needs: build

    steps:
    - uses: actions/download-artifact@v4.1.7
    - name: Configure AWS Credentials
      uses: aws-actions/configure-aws-credentials@v4
      with:
        aws-region: us-east-1
        aws-access-key-id: ${{ secrets.AWS_ACCESS_KEY_ID }}
        aws-secret-access-key: ${{ secrets.AWS_SECRET_ACCESS_KEY }}
Step 5: Continuous Deployment to Elastic Beanstalk Environment
To enable automatic deployments to Elastic Beanstalk, we need to configure some additional steps in our GitHub workflow. First, create an IAM user with permissions to access Elastic Beanstalk and S3. Attach the AWSElasticBeanstalkFullAccess and AmazonS3FullAccess managed policies.
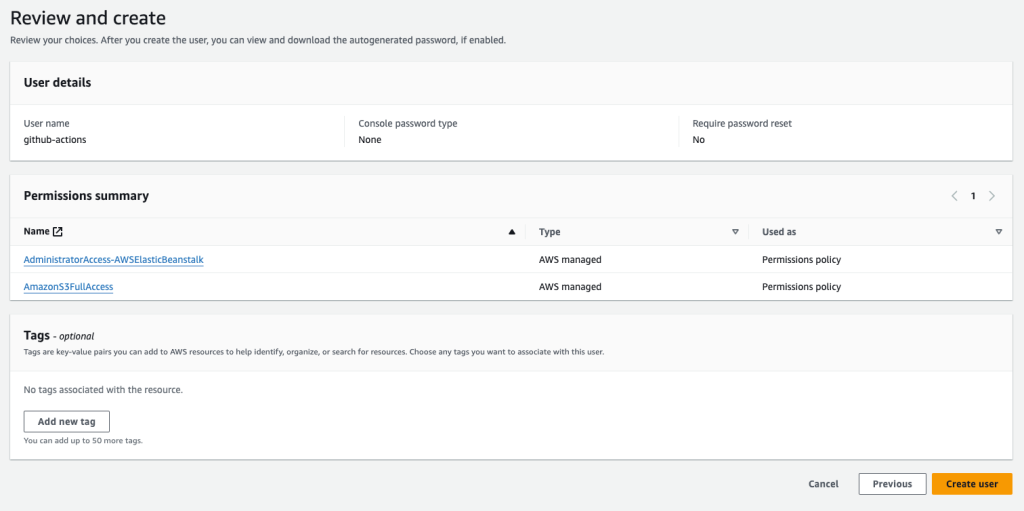
Figure 20: IAM User
Generate an access key and secret for this IAM user.
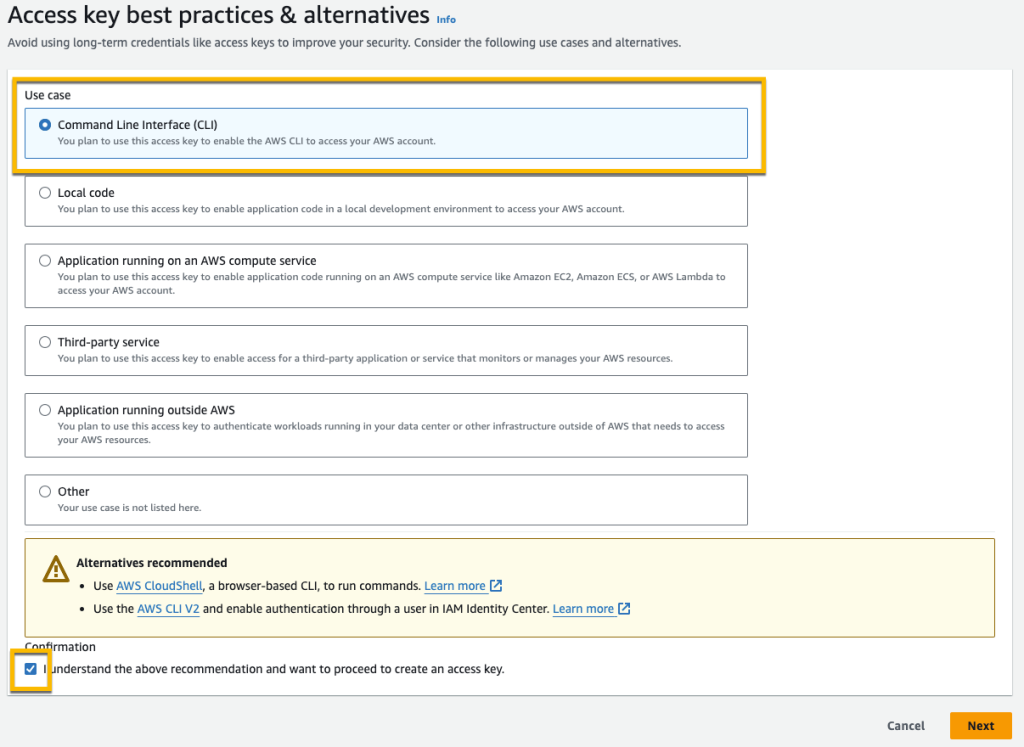
Figure 21: Access key generation
Add these as encrypted secrets in the GitHub repo settings:
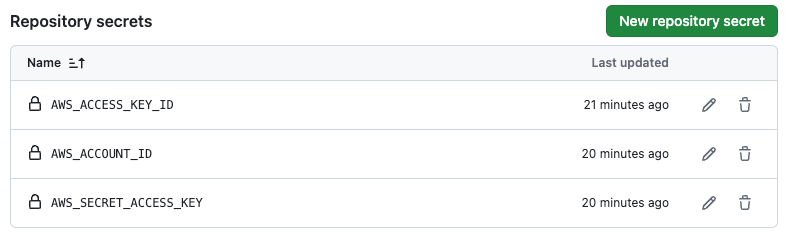
Figure 22: GitHub Secrets
Next, update the .github/workflows/dotnet.yml file with deployment steps:
    deploy:

    runs-on: ubuntu-latest
    needs: build

    steps:
    - uses: actions/download-artifact@v4.1.7
    - name: Configure AWS Credentials
      uses: aws-actions/configure-aws-credentials@v4
      with:
        aws-region: us-east-1
        aws-access-key-id: ${{ secrets.AWS_ACCESS_KEY_ID }}
        aws-secret-access-key: ${{ secrets.AWS_SECRET_ACCESS_KEY }}
    - name: Deploy
      run: |
        aws s3 cp "deploy-files/${{github.run_id}}.zip" s3://elasticbeanstalk-us-east-1-${{ secrets.AWS_ACCOUNT_ID }}/artifact/dotnet-mvc-app/
        aws elasticbeanstalk create-application-version --application-name $ELASTIC_BEANSTALK_NAME --version-label ${{github.run_id}} --description ${{github.run_id}} --source-bundle S3Bucket="elasticbeanstalk-us-east-1-${{ secrets.AWS_ACCOUNT_ID }}",S3Key="artifact/dotnet-mvc-app/${{github.run_id}}.zip"
        aws elasticbeanstalk update-environment --application-name $ELASTIC_BEANSTALK_NAME --environment-name $ELASTIC_BEANSTALK_ENV_NAME --version-label ${{github.run_id}}
        aws elasticbeanstalk wait environment-updated --application-name $ELASTIC_BEANSTALK_NAME --environment-name $ELASTIC_BEANSTALK_ENV_NAME
This will deploy the built artifacts to the Elastic Beanstalk environment on each run. Now, commits and pushes to the repo will trigger an end-to-end pipeline:
- Build, publish .NET app
- Package artifacts
- Copy to S3
- Deploy to Elastic Beanstalk
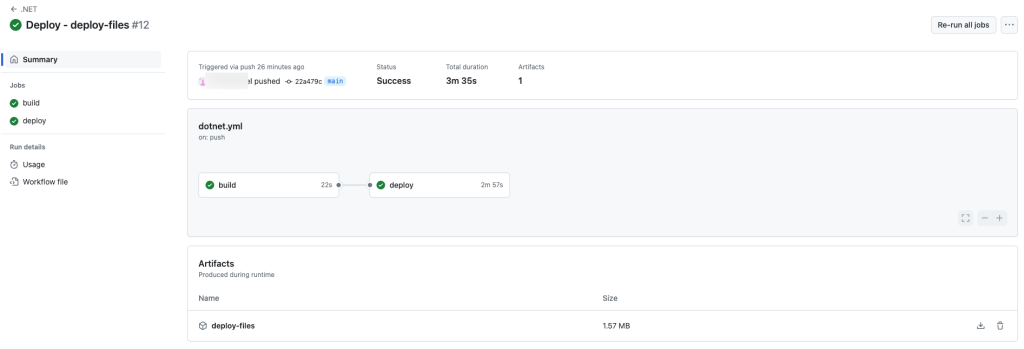
Figure 23: GitHub Action Deploy
Drilling down, you can view the build log and deploy log.
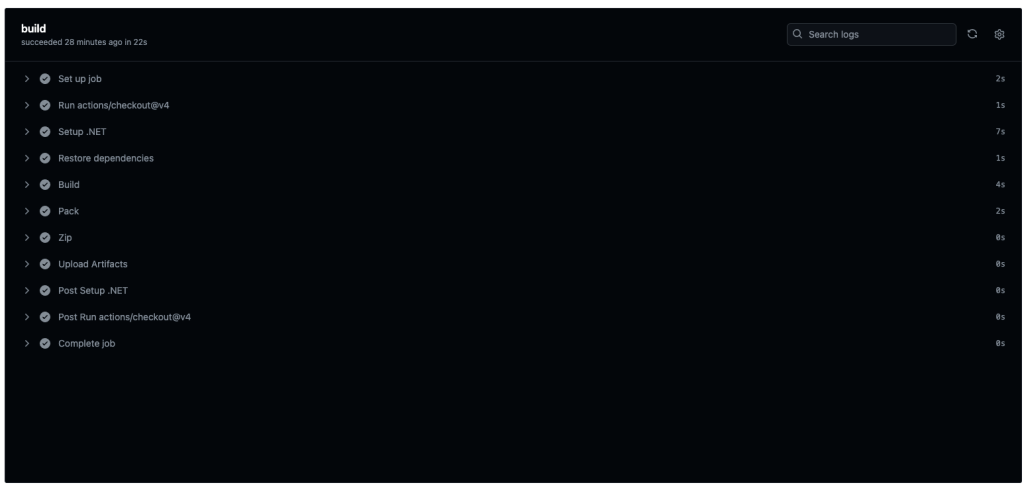
Figure 24: Build log
We can monitor the deployment status in the GitHub workflow logs and Elastic Beanstalk console. Once deployed, access the application URL to view the changes live!

Figure 25: Application running on Elastic Beanstalk
Now that we have continuous delivery set up, let’s make a change to our application code to see it deploy automatically. In Visual Studio, open a view file like Views/Home/Index.cshtml. Make a simple visible change like updating the page heading. Commit this change and push it to GitHub.

Figure 26: Home Index update
This will trigger our CI/CD workflow. We’ll see a new run start in the Actions tab.
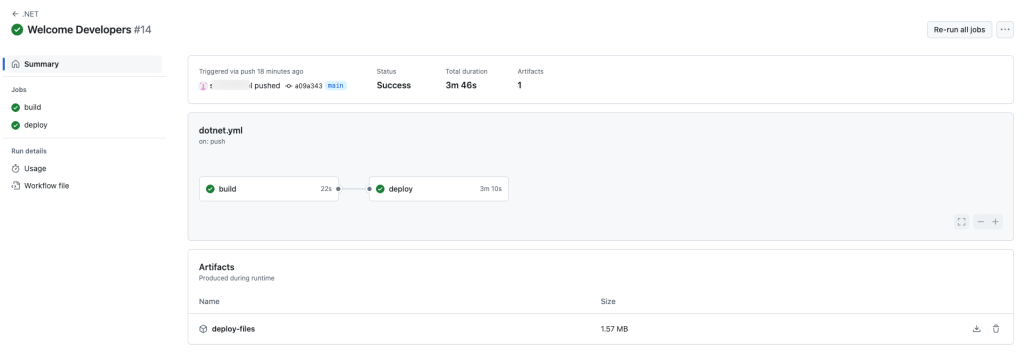
Figure 27: GitHub Actions Log
Once complete, the updated .NET application will be deployed to our Elastic Beanstalk environment automatically. After a few minutes, reload the application URL. We should now see our updated page heading! This demonstrates how code changes are continuously built, and released to Elastic Beanstalk through GitHub commits. Our pipeline automatically deploys the latest app version in just minutes!

Figure 28: Updated page on Elastic Beanstalk
Clean up
To avoid incurring future charges, delete the resources by terminating the Elastic Beanstalk environment and deleting the GitHub repo.
Conclusion
In this post, we walked through setting up a CI/CD pipeline for .NET applications using GitHub Actions and AWS Elastic Beanstalk. By leveraging these cloud services, we can automatically build, test, and deploy our .NET code whenever we push changes to our repository.
The end-to-end solution showcases some key benefits:
- GitHub Actions provides easy YAML-based workflows to define pipeline stages for building, testing, and deployment.
- Elastic Beanstalk gives a managed environment to run .NET apps without provisioning servers.
- Changes pushed to GitHub trigger automatic deployments to Elastic Beanstalk environments.
- The pipeline enables continuous delivery of applications from development to production.
Setting up this automation provides speed and reliability to the software delivery process. Code is shipped to users faster while maintaining quality through automated testing. This walkthrough demonstrated how GitHub and AWS can streamline deployments for .NET developers.
For more information on AWS Elastic Beanstalk, refer to the AWS Elastic Beanstalk Developer Guide.